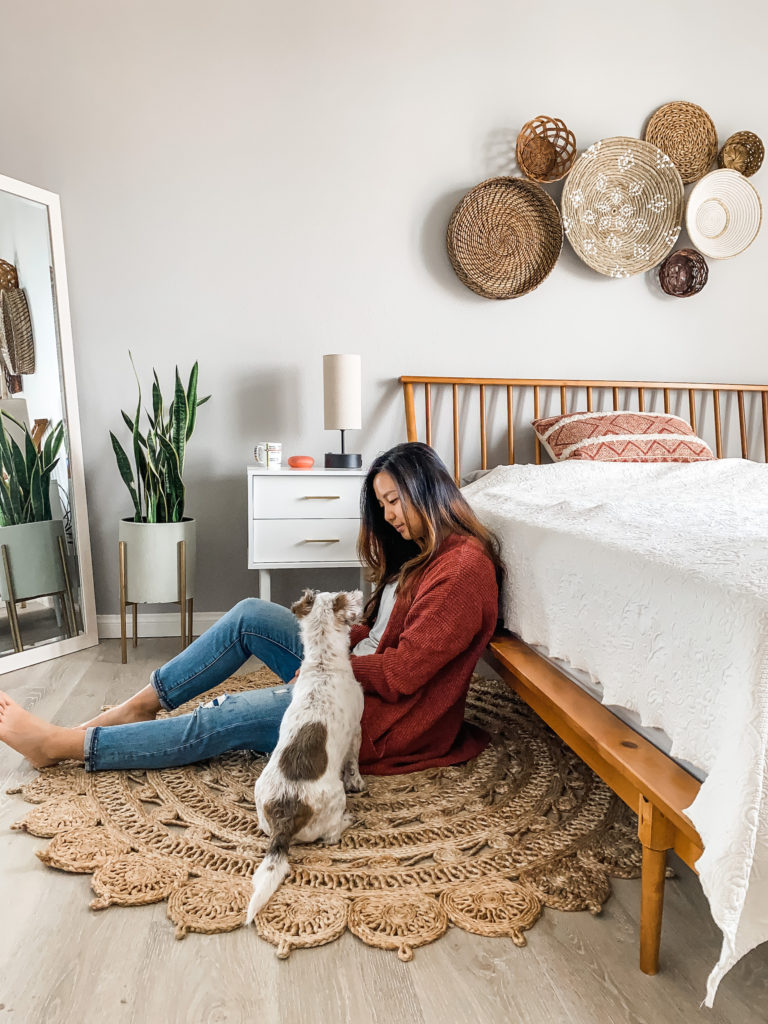

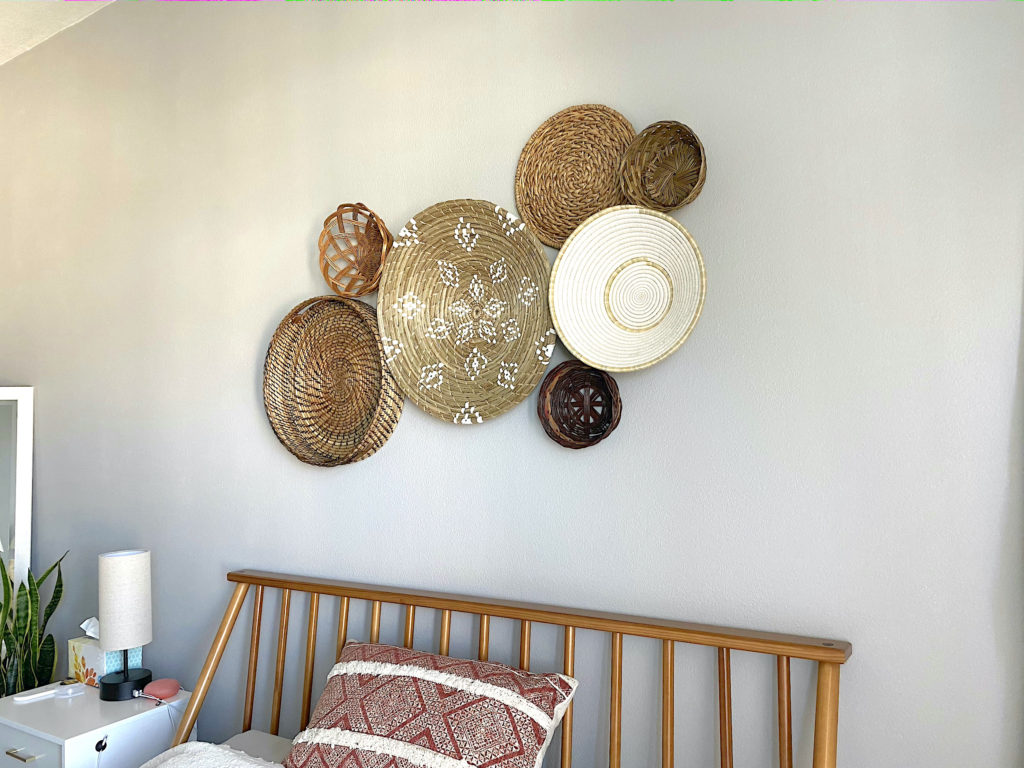
DIY Basket Wall
My basket wall marked the final piece of decoration for my apartment, so putting it together was very satisfying. This post will detail where I accumulated my baskets, design ideas, and tips to making this your own!
Finding Inspiration and Your Baskets
I did a TON of searches on Pinterest and Instagram for basket wall designs. There are many things to consider: arrangement, color, style, texture, shape, etc. This basket wall was to be above my headboard in my bedroom that has a boho vibe. So I knew I wanted light colors, rattan and wicker, round as opposed to oval, and for the baskets to be touching one another. I’ve seen pictures of baskets that are hung with space in between them and personally didn’t like that. I also knew that I wanted some to be ethically handmade, while the others could be thrifted.
I spent a day hopping from thrift store to thrift store, where I found 3 wicker baskets whose handles I removed. I also scoured the internet for common stores that could have similar items, and found runners/placemats at Target that did the trick, and I got lucky at a Marshall’s. I also stumbled upon a beautiful handmade basket from Anthropologie that would become my centerpiece. Throughout it all, I spent too much time browsing Etsy for handmade African woven bowls. My friend recommended I check out The Little Market, which sold ethically handmade African bowls, and I ended up buying this one in store.

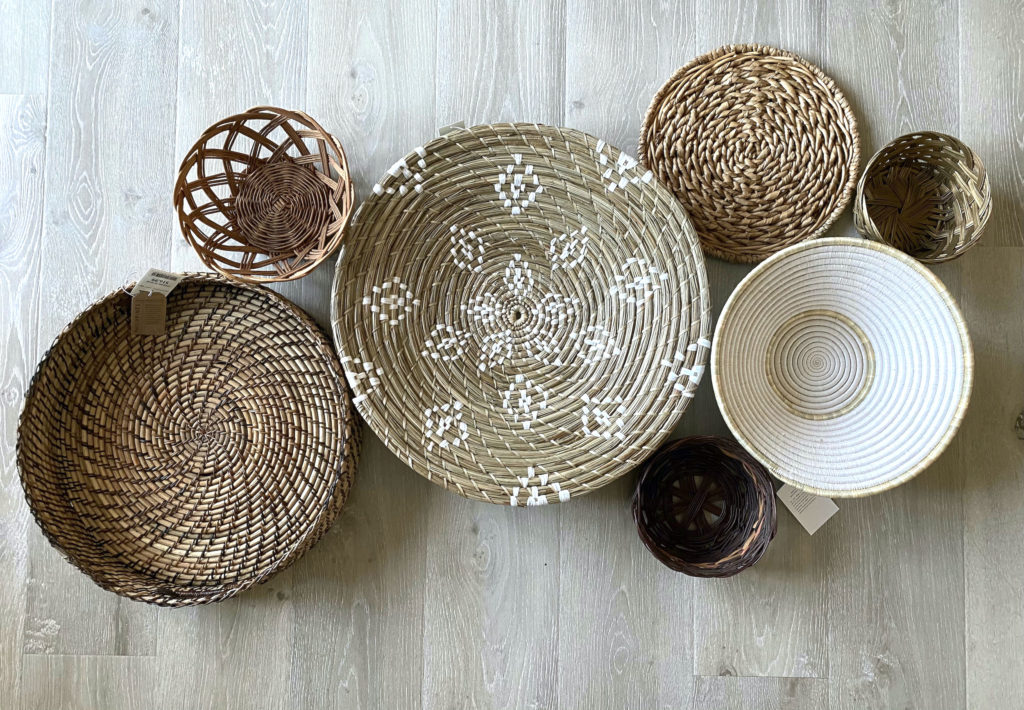
One thing to note is that I had a bunch of different textures and depths. The white woven bowl was deep, the rattan serving tray was shallow, and the placemat was flat. Somehow, they all worked out.
Putting It All Together
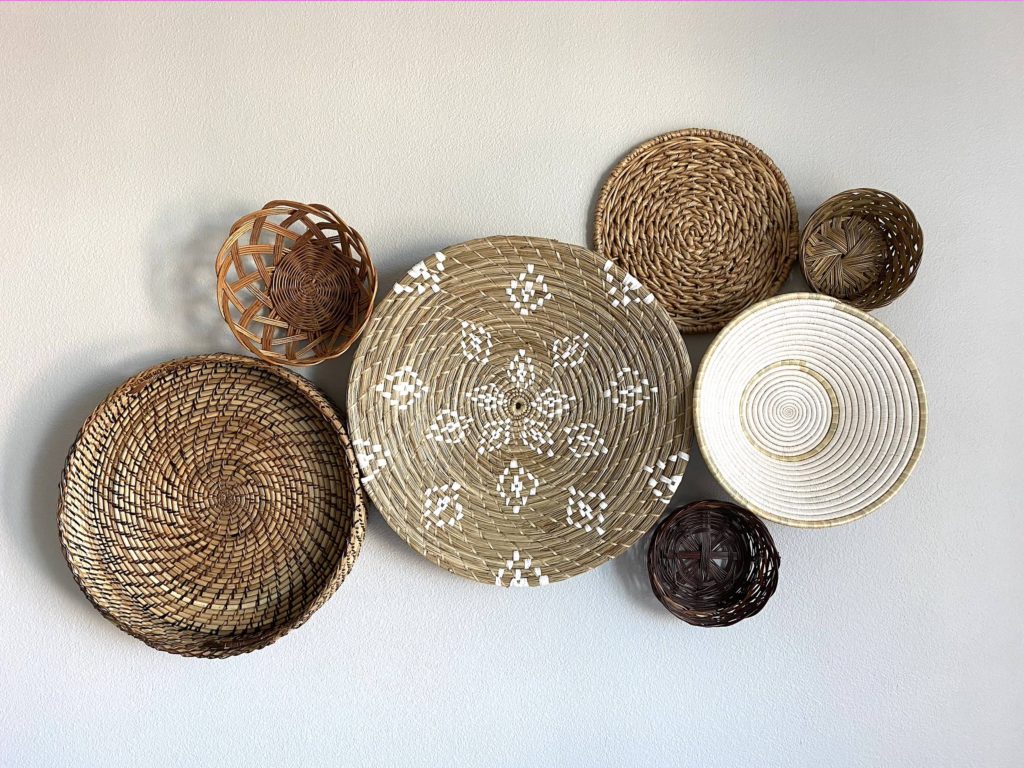
I didn’t start assembling my basket wall until I had all my baskets on hand. At most, I had taken photos of what I did have and pulled that out whenever I thought about buying another one to see if they complemented each other. In total I had 10 baskets, and ended up using the 7 that worked best. Some didn’t match each other, but I kept one to prop up against a shelf and returned the last two.
I arranged the designs on the floor first and took photos of each arrangement until I found one that I vibed with. For me, I wanted it to snake upward ever so slightly from the bottom left to the upper right.
Time to Hang Onto Your Wall
Only my centerpiece came with something to hook onto so I had to create my own for all the others using twine and thread. I picked strategic spots on the back of the baskets to loop the thread through. Since my wall is solid cement and I can’t drill any holes, I had sticky hooks that could hold up to 13 lbs and 1 lb, which was more than enough. My three large baskets used the strong hooks, and the small hooks worked fine for the lightweight wicker baskets.

Now I’ve seen other blog posts recommend that you cut out the full shapes of these baskets on newspaper before you do anything. Lazy me chose to skip all that and just go with my gut and eye.
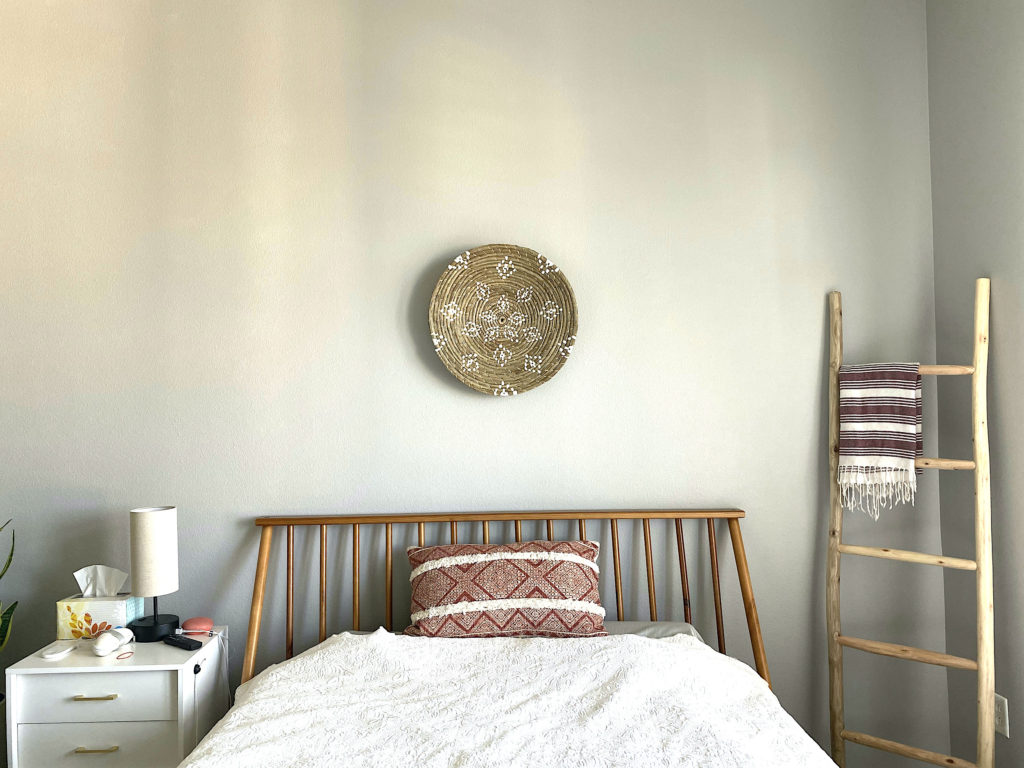
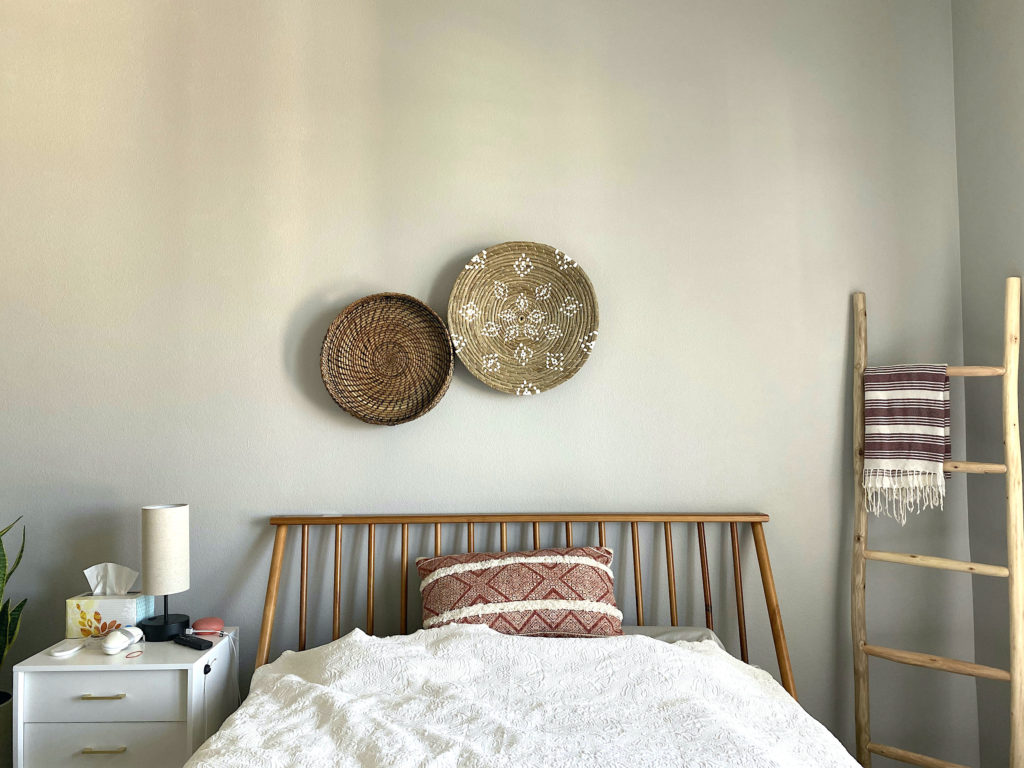
The first step is to hang your biggest basket. I centered mine and worked outward from there. One thing no one tells you is how high above your bed or bed frame to hang decorations. I chose to go with 16 inches for my centerpiece and since I wanted to arrange the basket wall gradually inclining upward, my lowest basket hung at 12 inches above my bed frame.
I mostly eyeballed the whole thing and had to retry just a few of the sticky hooks to get the right spot. But overall I think it turned out great! I’m very happy with it and it was so satisfying to put together. It’s such an eye-catcher when you walk into the room too!
Quick Tips
- Gather photos of other basket wall examples so you get an idea of what you like. Mood boards galore!
- Begin hunting down your baskets, starting with thrift stores and looking into homegoods shops or sites like Etsy.
- Once you have all of them together, arrange your baskets on the floor first and take photos of each arrangement to pick your favorite. Keep in mind colors and textures to create balance.
- Use 3M hooks or command strips to your advantage, keeping in mind the weight capacity.
- Cut out newspapers of your basket sizes and tape onto the wall first. (I couldn’t bother with this step lol.)
- Hang your biggest basket first and branch out from there.
- Do a little victory dance when you’re done and admire your work. Tweak as needed!
xx Sam